Python Installation and Configuration
The following is a comprehensive guide on using the Python programming language to write scripts for MASTA. It details the steps involved to get up and running with a version of Python that is compatible with MASTA, along with information on making the most out of Python scripting with MASTA.
Installing Python
A MASTA-compatible version of Python must first be installed to use the Python scripting functionality. The following versions are currently supported:
- 3.5.x
- 3.6.x
- 3.7.x
As of 1st January, 2020 Python 2.x is no longer being supported. This package will therefore only support the newer and currently supported Python 3.
For installation, we recommend downloading a stand-alone Python interpreter. If you would like to use Python on the command line, make sure to check the "Add Python 3.x to PATH" checkbox.
Downloading and Installing Python
If you already have a Python configuration on your machine that is of version 3.5.x or higher, then you may skip this section.
Download the Python 3.x exe installer and save it somewhere on your computer (when choosing an installer try to match the architecture of your processor, i.e. use 64-bit Python with 64-bit MASTA).
Once downloaded, on the first window check the 'Add Python 3.x to PATH' checkbox. Note that the button displays where Python will be installed. If this is unfavourable, select 'Customize installation'; otherwise click the 'Install Now' button to start the install.
Wait for the setup wizard to finish installation and click OK.
Verifying Python is Installed
Once Python has finished installing it needs to be verified to ensure it was installed correctly.
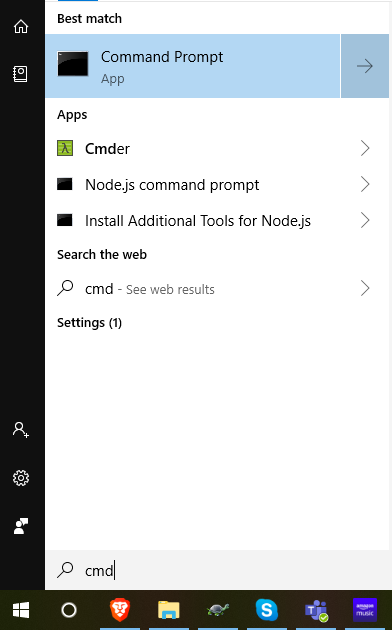
Start by opening Command Prompt (On Windows, search for
cmdand press enter).Figure 1 - Searching for
cmdon Windows.In Command Prompt, type
python --versionand press enter. If the Python version appears, then it has been correctly installed.Figure 2 - Running the python command.
Troubleshooting
It is possible that Python failed to install on your system, the following can be attempted:
Open the Environment Variables on your system (
Control Panel > System > Advanced System Settings > Environment Variables) and remove all User Variables calledPYTHONPATHandPYTHONHOME.Find the
PATHuser variable and make sure the path to your python installation is in it.
Configuring a Code Editor
To be able to write a Python program, a suitable code editor is required. For Python specifically, we recommend using Microsoft’s Visual Studio Code due to its wide language support and extensibility. Visual Studio Code can be officially extended to support the Python language, allowing for code highlighting and formatting, Intellisense, linting, debugging, Jupyter Notebooks and more.
Other editors may be used, such as Spyder, but these are not as flexible for integrating with MASTA. The rest of this guide assumes Visual Studio Code has been installed.
Setting Python up in Visual Studio Code
Make sure to download and install Visual Studio Code before proceeding. Once Visual Studio Code is installed, open the application and familiarise yourself with the layout. There is some brilliant documentation available online provided by Microsoft, including introductory videos, that you can use to learn the software.
To be able to use Python with Visual Studio Code an extension is needed. This can be installed using the Extensions tab inside Visual Studio Code:
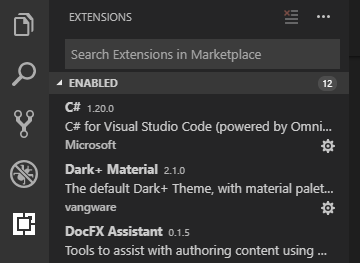
Select the Extensions tab in Visual Studio Code.
Figure 3 - Selecting the Extensions tab
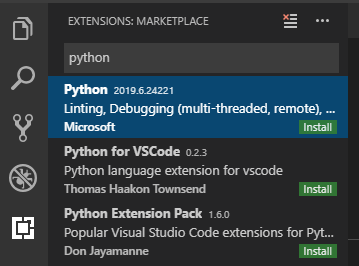
Search for python in the search bar and press enter. Click install on the first option (the extension created by Microsoft.)
Figure 4 - Installing the Python extension
You may also be prompted to install pylint. This is an optional linter installation and is not required for Python to work in Visual Studio Code, but is useful for automatically spotting programming errors.
Verifying Visual Studio Code is using the correct version
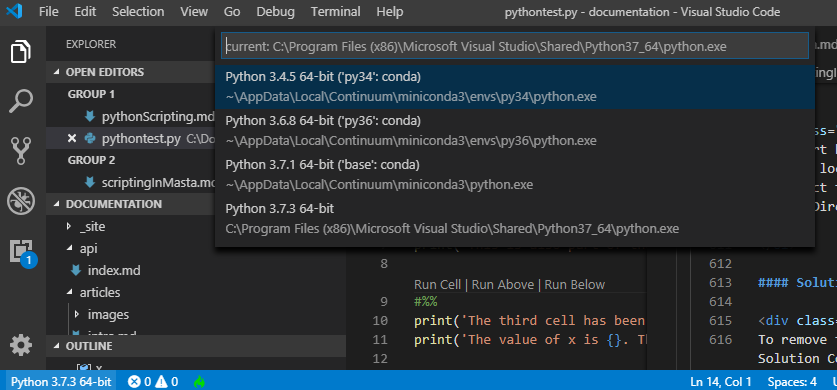
Once the extension is installed, verify the correct Python interpreter is being referenced by Visual Studio Code. You can do this by selecting the Python interpreter on the status bar (the blue bar at the bottom of the window), then selecting your Python installation from the drop-down menu that appears. See the images below. For this guide Python 3.7.1 was used but your version may be different. Your version can be checked by following the steps in the section Verifying Python is Installed.

Click on the status bar where it tells you the currently selected Python interpreter. For this to appear, a Python file must be open in the editor. If you do not have one, create a new file and save it to your Python Solutions directory.
Select the correct Python version from the drop-down menu that appears at the top of the window.
Continue to the next article: Using Python with MASTA.